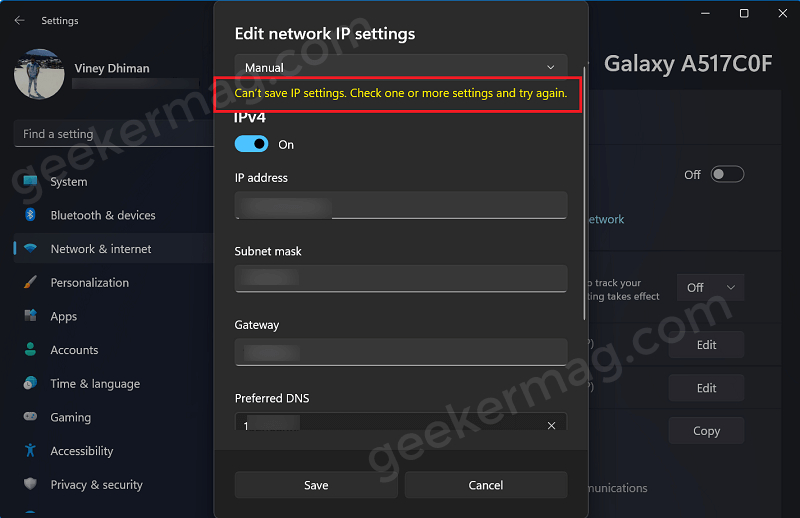
Windows 11 is developed to automatically acquire the IP address. In case, users want to set public DNS Server or manually enter the IP address, then they can also do that right from the settings app. For some users, the process completes without any problem. On the other hand, some users reporting that whenever they’re trying to do the same, they’re receiving an error message that reads: If you made up to this blog post, then you may be seeing the same error message, right? Well, you’re in the right place because we will cover possible solutions on how to fix the issue: Before you start exploring the solution, we suggest users:
To reboot computer and try againCheck if latest update is available for their device. If yes, install it and check if this fixes the issue.
Fix – “Cant Save IP Settings Error in Windows 11”
If you’ve tried both quick solutions already, then try the solution discussed below:
Change IP Settings using Settings app
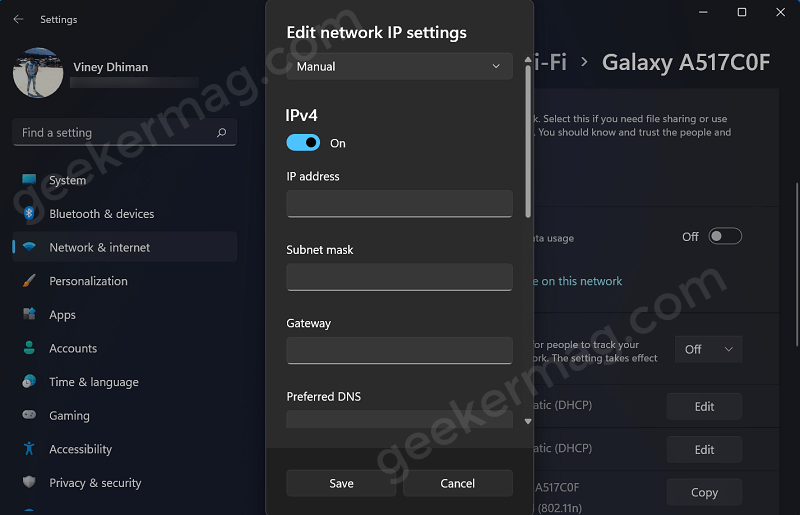
The error message you’re seeing may be due to the wrong data that you have filled or due to some typo in the IP Settings. So, to fix the issue, you have to check and verify all the data again. For that, launch Settings > Network & Internet > IP Assignment. In the Network IP Settings dialog, select Manual. Here, turn ON IPv4 or IPv6 and then enter all the details. In IPv4, you will find Subnet Mask settings, while the same is replaced with Subnet Prefix Length in IPv6 settings. So it is very important that to fill right details in the right fields. In case you have cross-checked the above details and still receiving the “Can’t save IP settings” error, then, try to fill in the IP details using the classic method discussed below
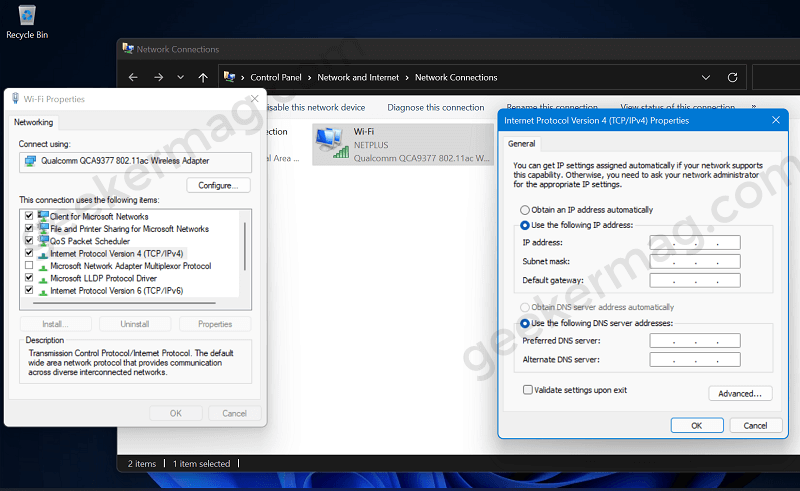
Change IP Settings using Control Panel
Try to modified IP Settings using the steps discussed below: Open the Run dialog by pressing Win + R, then type ncpa.cpl command and press Enter Instantly, the Network Connections folder will open up. You now need to right-click on the active network adapter and select the ‘Properties‘. Look for the options that read “Internet Protocol Version 4 (TCP/IPv4)” or “Internet Protocol Version 6 (TCP/IPv6)“, select one depending on your requirement, and select Properties. Here, select “Use the following IP address” and fill following details: IP address, Subnet Mask, and Default gateway. Apart from that, you can also set Prefered and Alternate DNS Server. At last, click OK to apply the changes.
Reset IP Address
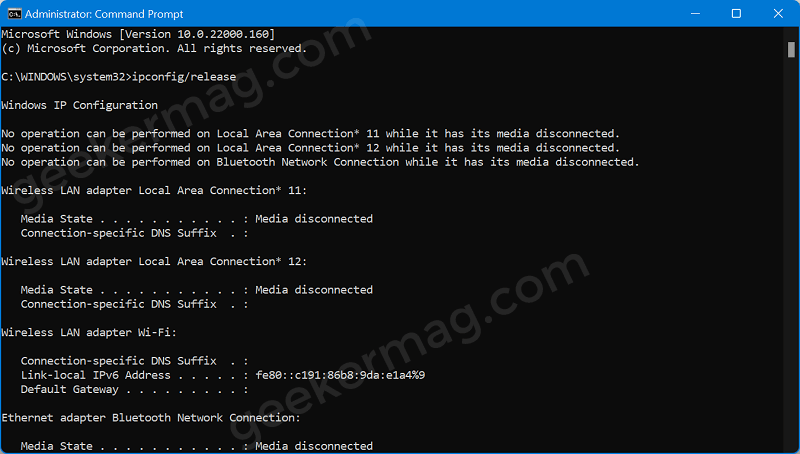
The majority of users suggested they were able to fix this issue just by resetting the IP address. Here’s how you can do that: Launch Elevated Command Prompt windows and then execute these two commands: ipconfig/release and ipconfig/renew The above command will clear the internet cache. After doing this, your device will be disconnected from an internet connection. Now using one of the methods discussed above, try to enter IP settings and check this fixes the issue.
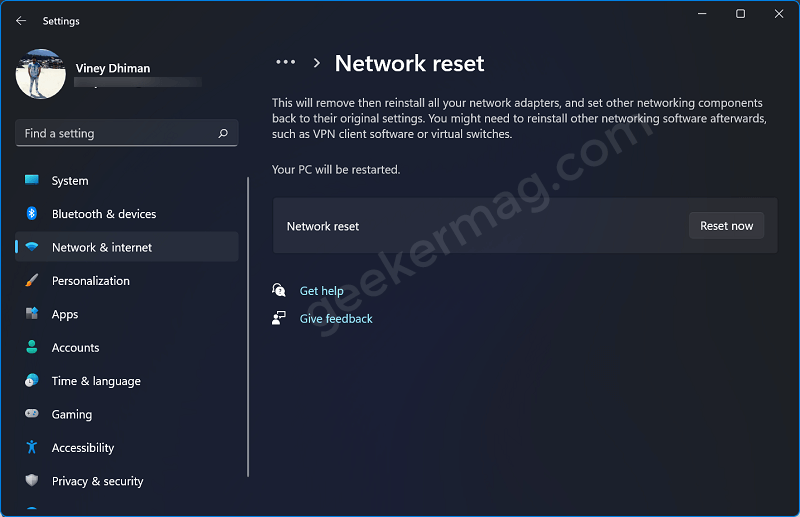
Reset Network
If nothing works, then the last solution is to reset your internet connection. Windows 11 offer a setting using which users can make that thing happen. Here’s how you can do that: Launch Settings > Network & Internet > Network Reset. Here, click on the Reset Now button. Doing this will reset your internet connection. Now try to reconnect to your internet connection and check if this fixes the issue. So these four possible solutions using which you can fix “Can’t save IP settings error in Windows 11. If you know any other solution that fixes the issue for you, then feel free to share it with us in the comments.